buttons

Image Map

Tuesday, July 31, 2018

Stampin' Up Blended Seasons Online Card Class


To view on YouTube, click HERE.

Hi everyone!  It's Tuesday so that means that it's time for me to announce this week's online card class! :)  This week's class uses the limited edition Blended Seasons Bundle!!!  This bundle will only be available from August 1-August 31, or while supplies lasts so you definitely want to pick this one up.  It's so gorgeous and the framelits dies that coordinate are absolutely fabulous!  This class will use the new Assortment 2 watercolor pencils too.  The video above shows everything you will be getting in this class.


Starting August 1, for every $50 you spend, you will receive $5 in Bonus Bucks you can use for product in September.  So, this class will get you some free money to use in September :)  Now, let's get to the class!


Here's a picture of the items that come in the class.


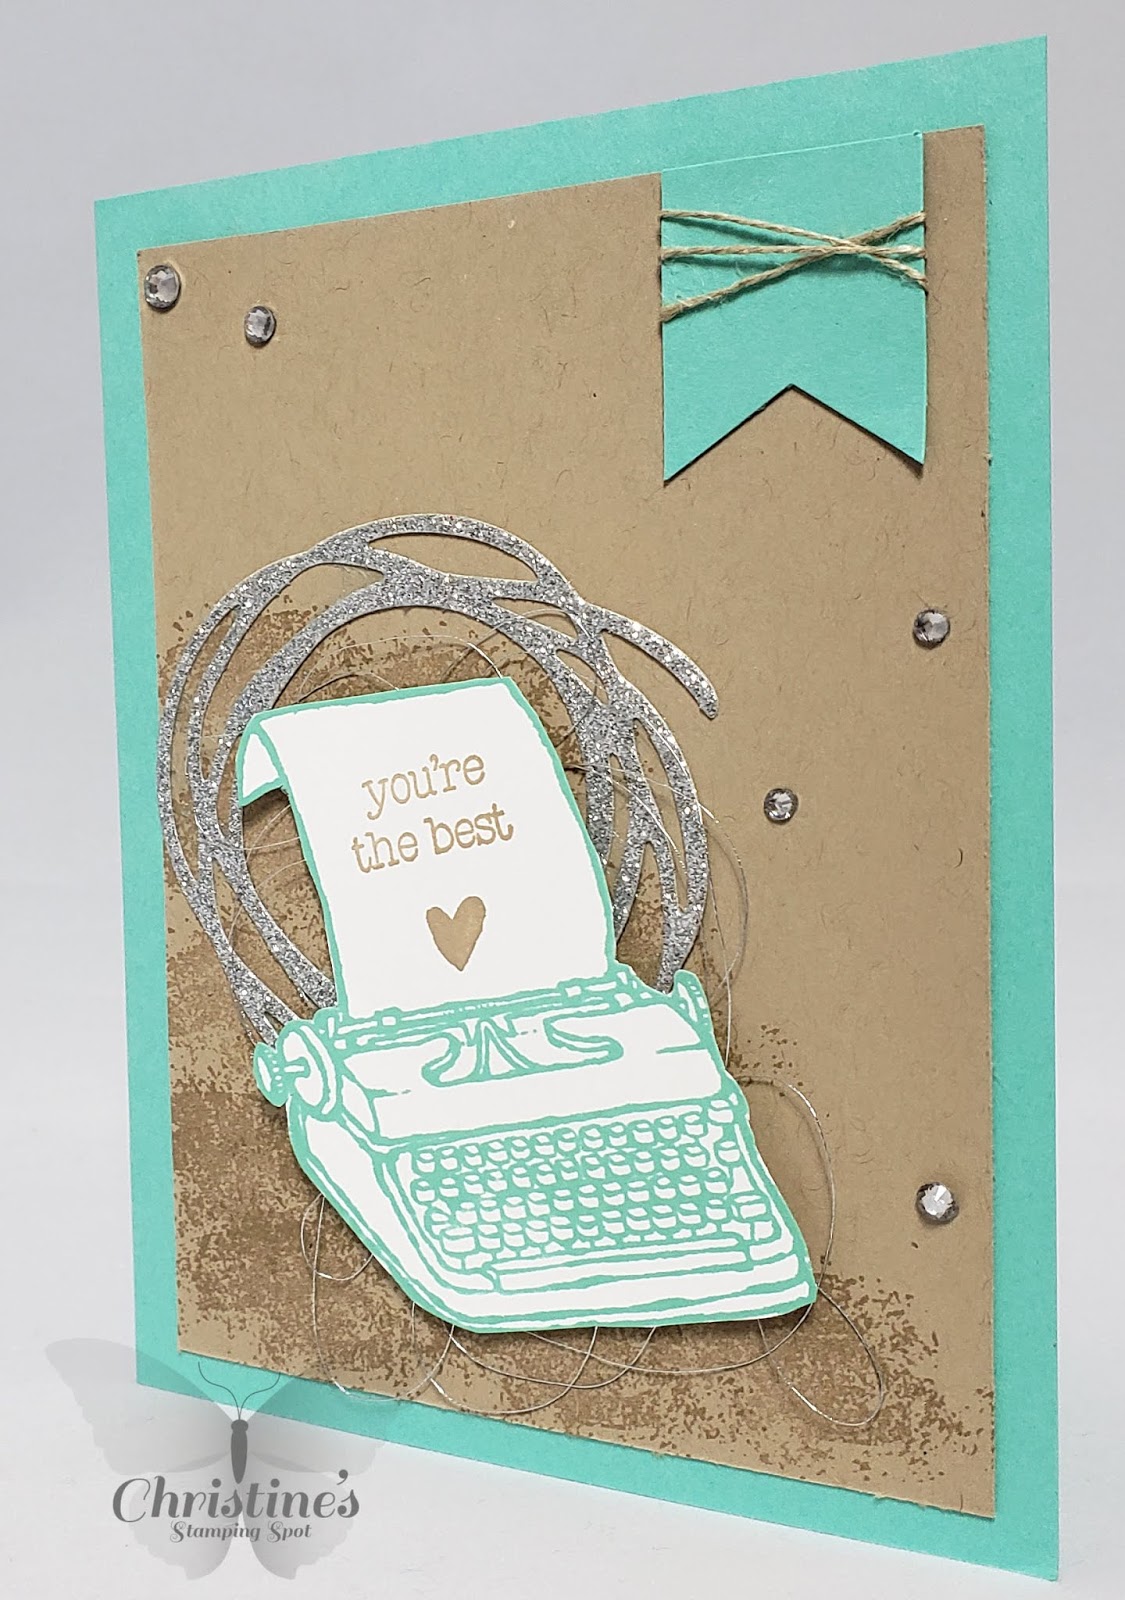
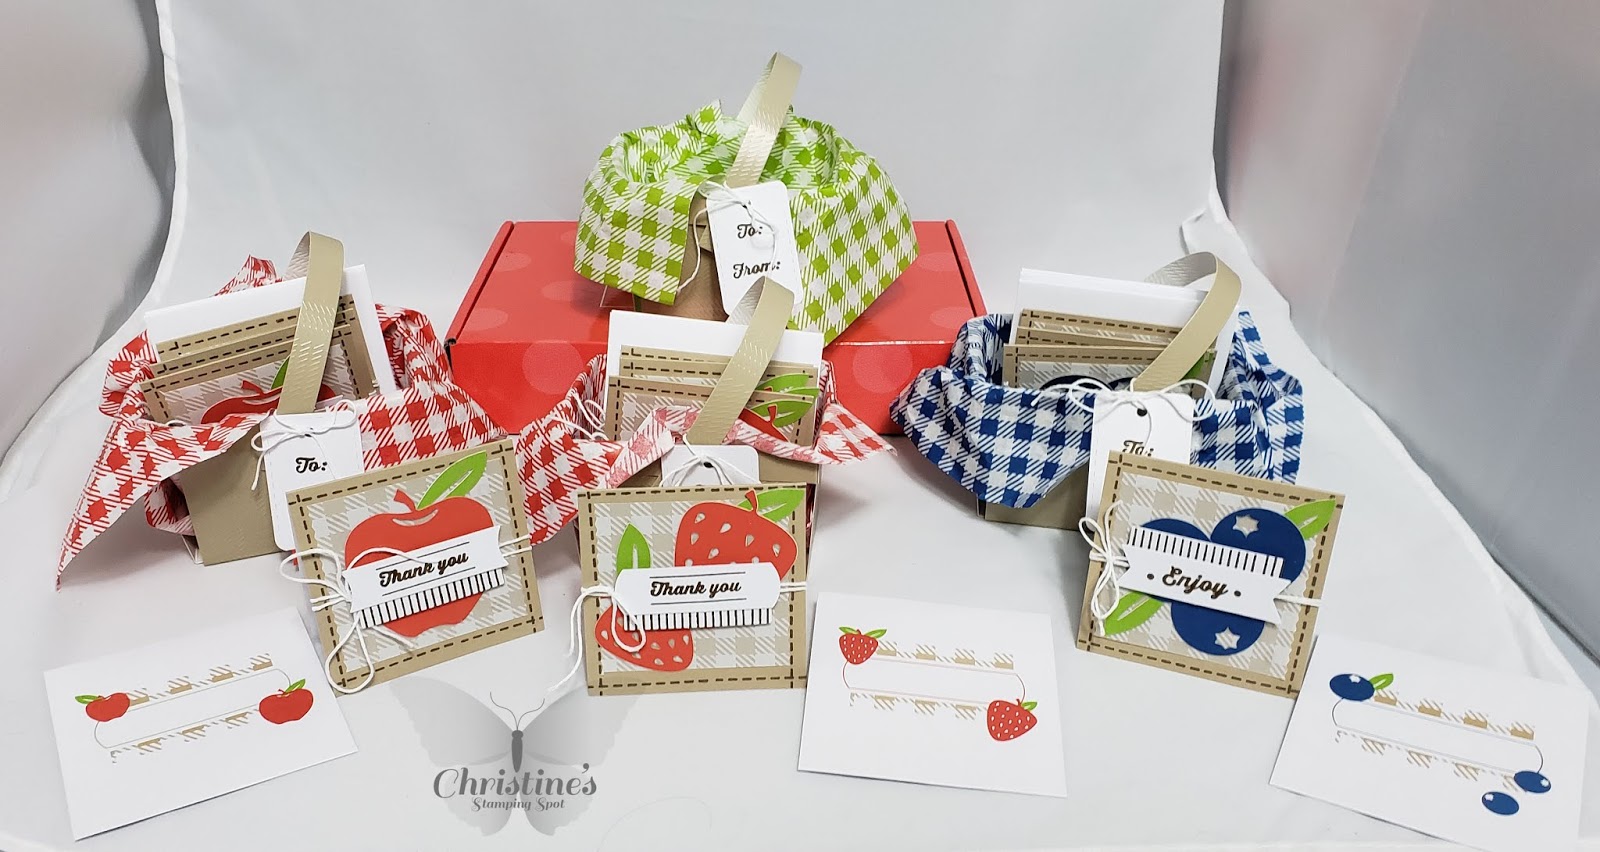
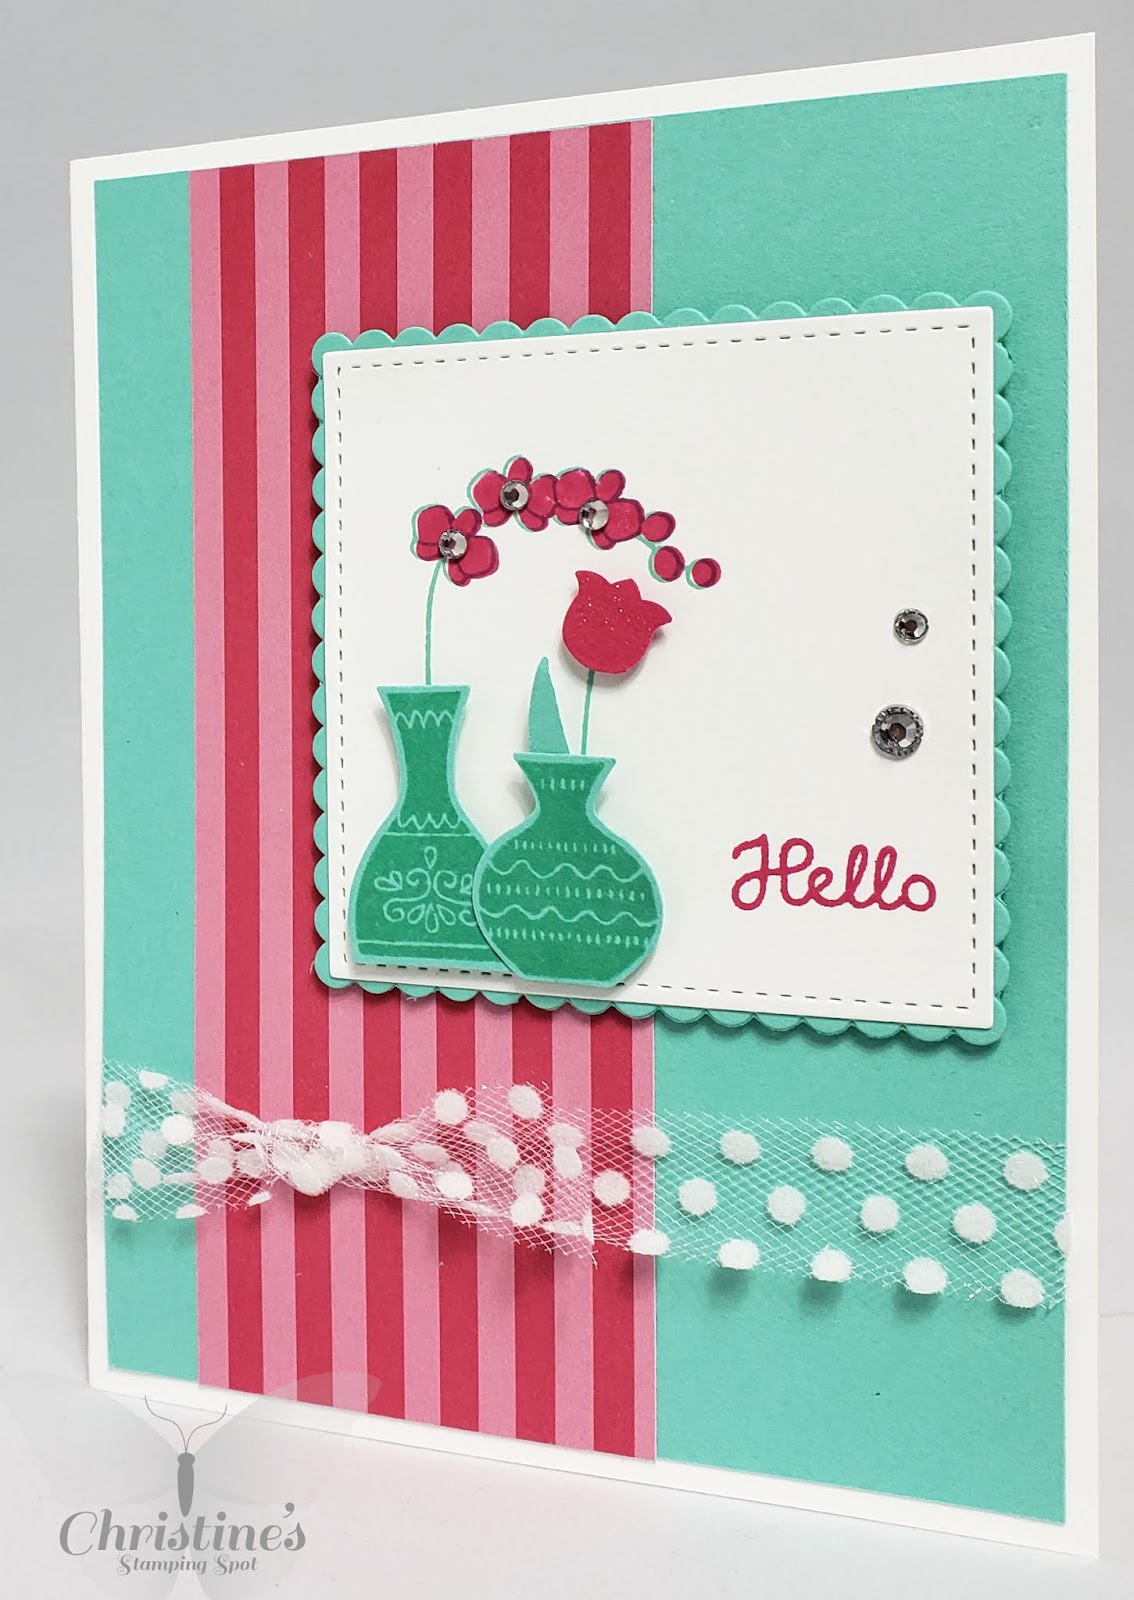
And here are some cards I received as part of a demonstrator swap using this gorgeous bundle.  Also, here's a video I did using this stamp set to create my swap card:


To view on YouTube, click HERE.


Class information:
The way my online classes will work is that if you decide you want to join the class, you will email me at christinemriley@gmail.com to sign up for the class. You will send payment via PayPal for the supplies (only the catalog items, in this case, the Blended Seasons bundle and the Watercolor Pencils Assortment 2).  ***You will need your own Staz On Jet Black ink pad for this class (if you'd like to add one to your order, just let me know in your email). You will then receive from me for free with your order all of the supplies needed to create 6 cards, two each of three designs. You can see the free supplies you will be getting in the video above. I need you to please email me by noon EST on Monday, August 6, 2018 if you want to take the class. That way, I can place the order with Stampin Up, and then create your class packets and get everything shipped to you. I will ship the class items to you the week of August 13, 2018. The total cost of this class is $84.25 for the bundle and ink pads (this is the exact cost from the catalog) plus $5 shipping for me to ship the products and class materials to you for a grand total of $89.25 (I know this class is pricey, but you will qualify for my August promotion and you will also get some Bonus Bucks in the month of August!!!!  For every $50 you spend on product, you earn $5 in Bonus Bucks, which you can redeem in September).  Along with the products and class materials, you will also get access to an exclusive class video wherein I will teach you step by step how to create the six cards. I will also provide you with a PDF document which will show step by step how to create the six cards.  You can also add to your order if you like, just email me what you'd like to add and I'll place the order for you once you PayPal me the cost of the order.
**If you are already a demonstrator but you are interested in the videos for this class, for $15, you will get access to the video, the class materials and an email copy of the PDF file. Just send me an email at christinemriley@gmail.com if you would like to utilize this option. Thanks so much, I think you will really love this class!!! :)  Hugs! Hugs, Christine

Last Day to Join My Team and Get Ten Free Ink Pads!!!!!


I can't let today go by without reminding you guys one more time of this amazing promotion available from Stampin' Up!  If you join my team by midnight MST tonight, you get your starter kit ($125 worth of product for $99) plus TEN FREE INK PADS from a color family of your choice!!!!!  Remember, Stampin' Up just did a color revamp and changed the configuration of their ink pads and ink so now is the time to get these new ink pads.  You get all of this for $99 and you don't even have to pay shipping!!!!

To be a demonstrator, you DO NOT have to sell products or host parties or do anything at all if you join my team.  Once on my team, you get a 20% discount on all Stampin Up supplies.  After a certain amount, you then get 25% off!!!  You do have to meet a minimum every quarter, but if you don't, no big deal, you just become inactive and go back to being one of my awesome customers :)

So hurry, the clock is ticking.  If you have any questions, email me at christinemriley@gmail.com.  To join my team, click here: JOIN MY TEAM

Hugs, Christine

Friday, July 27, 2018

Don't Forget - Stampin' Up Designer Series Paper Sale


Hi everyone!  Just a quick reminder about Stampin' Up's amazing designer series paper sale going on through the end of this month (July, 2018).  this is a fabulous deal so make sure to head over to my shop (HERE) or click the "Shop" tab at the top of my blog.  You definitely don't want to miss out on this great sale!!!!!

Hugs, Christine

PS Sorry for not much posting this week, I've been a bit under the weather, but I plan to catch up this weekend and I'll have lots of videos for you :)  Hugs!

Tuesday, July 24, 2018

Stampin Up Little Elephant Online Card Class


To view on YouTube, click


Hi everyone! I'm so excited to introduce my next online class to you. The way my online classes will work is that if you decide you want to join the class, you will email me at christinemriley@gmail.com to sign up for the class. You will send payment via PayPal for the supplies (only the catalog items, in this case, the Little Elephant bundle and the Mint Macaron, Melon Mambo, and Basic Gray ink pads. You will then receive from me for free with your order all of the supplies needed to create 6 cards, two each of three designs. You can see the free supplies you will be getting in the video above. I need you to please email me by noon EST on Monday, July 30, 2018 if you want to take the class. That way, I can place the order with Stampin Up, and then create your class packets and get everything shipped to you. I will ship the class items to you the week of August 6, 2018. The total cost of this class is $66.58 for the bundle and ink pads (this is the exact cost from the catalog) plus $8 shipping for me to ship the products and class materials to you for a grand total of $74.58. Along with the products and class materials, you will also get access to an exclusive class video wherein I will teach you step by step how to create the six cards. I will also provide you with a PDF document which will show step by step how to create the six cards. **If you would like to substitute any of the ink pads (say for example you already have the Mint Macaron ink pad and wish to get something else, just include that in your email. You can also add to your order if you like, just email me what you'd like to add and I'll place the order for you once you PayPal me the cost of the order. You will need to supply your own adhesive and dimensionals.
**If you are already a demonstrator but you are interested in the videos for this class, for $10, you will get access to the video, the class materials and an email copy of the PDF file. Just send me an email at christinemriley@gmail.com if you would like to utilize this option. Thanks so much, I think you will really love this class!!! :)  Hugs!
Hugs, Christine

Creating a Sweet Card Using the Little Elephant Bundle from Stampin' Up


To view on YouTube, click HERE.

Hi everyone!  For today's card, I just had to use the Little Elephant bundle from Stampin' Up!  This bundle is so adorable and really very versatile.  Here are some pictures of my card:


To create today's card, I first started with a piece of scrap Whisper White cardstock.  I stamped my elephant on the cardstock with Basic Gray ink and then again in Gorgeous Grape. I punched the Gray elephant out with my punch, then just the ear part of the Gorgeous Grape elephant with the punch.  I popped the Grape ear onto the elephant with a mini dimensional :)  Next, I cut a square of Whisper White cardstock out using my Stitched Shapes framelit dies.  I stamped the fun stripey image with Granny Apple Green onto the bottom of the square.  Next, I stamped the little Thank You balloon with Gorgeous Grape ink, then tied a small bow at the end with Whisper White Baker's Twine and then thread that twine to the ear of the elephant and secured it under the trunk with a mini glue dot.  I then adhered some dimensionals on the back of the rest of the elephant and stuck him down.  I then adhered the Whisper White panel to a scalloped Gorgeous Grape square cut out using the Layering Squares Framelit dies.  I then ran a piece of Granny Apple Green cardstock (measuring 5 1/4" by 4") through my Big Shot using my polka dot embossing folder.  I adhered that to a Thick Whisper White card base (measuring 8 1/2" by 5 1/2", scored at 4 1/4").  I then cut a strop of Granny Apple Green cardstock at 4 1/4" by 1" and then stamped my sentiment with Granny Apple Green ink. Next, I cut a piece of Basic Gray cardstock to 4 1/4" by 3 1/4" and then stamped some flowers right above where I planned to adhere the Granny Apple Green cardstock (I stamped them with Gorgeous Grape ink).  I adhered that panel to the card base, then adhered the square panel with dimensionals.  For some finishing touches, I added a striped Gorgeous Grape ribbon and Glitter Enamel Dots in the Granny Apple Green Color.  What do you think?

I will be doing my next online card class with this bundle so make sure to stop back by later today for a video and blog post that explains the class in detail.  Thanks so much as always for stopping by.  I'll link below all the products I used to create this card.  Thanks again!
Hugs, Christine

Join My Stampin' Up Team - Huge Promotion!!!!!


JOIN MY TEAM HERE!!!!!

Hi everyone!  I just wanted to pop on and remind everyone that if you join my Stampin' Up team by July 31st, not only will you get your normal starter kit, which includes $125 worth of product for $99 with free shipping, but you will also get ten free ink pads from the color family of your choice!!!!!  This is an amazing promotion and one I've never seen before so I just had to let you guys know about it, you don't want to miss this.  There are often lots of questions about what exactly it means to become a demonstrator so I'm going to answer some of those questions below.

Frequently asked question about being a Stampin' Up! demonstrator:
Question: I don’t like doing sales, so how can I be a Stampin’ Up! Demonstrator?

Answer: You do not have to make any sales to anyone else; becoming a demonstrator can be for you alone to enjoy stamping/card making/scrapbooking. Becoming a demonstrator automatically gives you a 20% discount on your Stampin' Up! purchases. Who doesn't appreciate a discount?

Question: What are the minimums? And what happens if I don’t meet them? Do I have to pay back $$ to Stampin’ Up!?

Answer: If you take advantage of the free family of ink pads included with your starter kit when you join my team before the end of July, you will have until December 31st to make your $300 minimum. Thereafter it is $300 per quarter (every 3 months). Nothing happens if you don't meet your minimum - you will simply no longer be a demonstrator.

Question: I don’t usually like what comes in the “Starter kits” for things like this.
Answer: YOU get to select the items that come in your starter kit. You can choose any items you wish from the current catalog that total $125 and you pay only $99 plus any applicable tax - shipping is free. From now until the end of July you will also choose an entire family of ink pads (neutrals, subtles, brights, regals or in colors, a $67.50 value). What this means is that you get product worth $192.50 for only $99!!! This is the absolute best deal I have ever seen since becoming a demonstrator in 2015. You have nothing to lose....come and join my team; I would love to welcome you!!!

It would be an honor to have you on my team!!!!  To join my team, simply click HERE.

Monday, July 23, 2018

Creating a Sweet Card using Stampin' Up's P.S. You're the Best Stamp Set


To view on YouTube, click HERE.

Hi everyone!  I'm excited to share today's card with you.  It's a super simple card design and takes no time at all to put together, but I really like the results and I hope you do to.  Here's a couple pictures:


I first stamped the cute typewriter from the P.S. You're the Best stamp set in Coastal Cabana ink onto some scrap Whisper White cardstock and then cut it out with my paper snips.  I then stamped my sentiment and the heart with Crumb Cake ink onto the typing paper.  Next, I took a piece of Crumb Cake cardstock (measuring 3 3/4" by 5") and stamped the smudge background image from the stamp set into the bottom right corner with Crumb Cake ink..  I then grabbed my Swirly Scribbles Thinlit dies and cut out the large swirly circle using my Silver Glimmer paper (I used my Precision Base Plate to cut this out).  I then adhered the glimmer circle to the Crumb Cake cardstock and then adhered the Crumb Cake to a Coastal Cabana card base (which measures 8 1/2" by 5 1/2", scored at 4 1/4").  Next, I took a strip of Coastal Cabana cardstock and cut it to 1" wide.  I used my Triple Step Banner Punch to punch a banner, then trimmed the piece to 1".  I then wound some Linen Thread around it and adhered it to the top right hand corner of the Crumb Cake cardstock.  Next, I put some dimensionals on the back of my typewriter and then wound some silver metallic thread along the back, then stuck it down to the card front.  For a finishing touch, I added some rhinestones.  What do you think?

Well, that's it from me today and I thank you so much as always for stopping by.  I will link below to all the products I used to create this card. Hugs!

Hugs, Christine

Sunday, July 22, 2018

Watercolor with Soon to Be Released Bundle from Stampin' Up!


To view on YouTube, click HERE.

Hi everyone!  I have another card and video up for you today, this time using a soon to be released for a limited time bundle from Stampin' Up!  This bundle will be available August 1, 2018-August 31, 2018.  As a demonstrator, I got to order the bundle this month.  It's awesome!  It contains the Blended Seasons stamp set, coordinating Stitched Seasons Framelit dies, and a second assortment of watercolor pencils!!!!  In today's video, I share this bundle as well as a card I created.  Here's a couple pictures of my card:


I first stamped my leaf image from the Blended Seasons stamp set with Staz on Jet Black ink onto watercolor paper.  I then cut out the image using a die from the Stitched Seasons framelit dies.  I then colored the image with my watercolor pencils and an aqua painter.  Next, I stamped my sentiment with Crumb Cake ink onto a piece of Crumb Cake cardstock measuring 5" by 3 3/4".  I then adhered the Crumb Cake panel to a piece of Real Red cardstock cut at 5 1/4" by 4".  I then adhered that to a Thick Whisper White card base measuring 5 1/2" by 8 1/2" scored at 4 1/4".  I took a piece of Gold Foil paper (5" by 2") and ran it through my Big Shot with my Garden Trellis embossing folder and then adhered it to the top of the Crumb Cake.  I adhered my watercolor panel to my card base using dimensionals and then cut a leaf from the Stitched Seasons framelit dies from gold foil paper and adhered it to the panel.  I added a small bow made with Linen Thread and then added some Gold Metallic Pearls for a finishing touch.

I think you guys are really going to love this bundle!  I'm going to be doing an online card class using this bundle and will announce that class on August 1 so stay tuned for that.  Thanks so much as always for stopping by and have a wonderful day!!!
Hugs, Christine

Stampin' Up July Paper Pumpkin plus Huge Paper Pumpkin Promotion!!!


To view on YouTube, click HERE.

Hi everyone!  In today's video, I wanted to share July's completed Paper Pumpkin kit with you (I also complete a few elements on camera with you as well).  Here's a couple pictures of this month's kit:


How cute is this kit?!?!  I think these little baskets would make great teacher gifts for back to school time.  I also wanted to let you guys know that if you subscribe to Paper Pumpkin between now and August 10, you get 50% off your first back (which would make it less than $10)!!!!!  That's a fantastic deal!


If you have any questions about Paper Pumpkin, feel free to contact me, or you can sign right up HERE (or click the "Join Paper Pumpkin" tab at the top of my blog).  Thanks so much as always for stopping by and I hope you enjoyed today's video :)
Hugs, Christine


Saturday, July 21, 2018

Creating a Beautiful Floral Card with Stampin' Up's Healing Hugs Stamp Set


To view on YouTube click HERE.

Hi everyone!  I hope you are all having a wonderful weekend.  I was so excited to play with the gorgeous Healing Hugs stamp set from Stampin' Up!  This is one of the distINKtive stamp sets in the catalog (they are delineated with a little icon in the catalog and there are a few sets).  They are oh so gorgeous.  What these stamps do is they provide a photo realist look to your stamped image.  You know how we get beautiful, realistic looking images with three step stamping?  Well, this line of stamps allows you to do that with just one stamp.  It's brilliant and oh so beautiful.  I decided I'm going to do an online card class with this stamp set in the near future so stay tuned for that :)  Here are some pictures of my card:


Isn't that floral image gorgeous?  I just LOVE this stamp set.  To create this card, I first stamped the flower and the leaves on a scrap piece of Whisper White cardstock.  I stamped the flower with Blackberry Bliss and I stamped the leaves with Granny Apple Green.  I then cut them out, adhered the leaves to the back of the flower with some glue dots, and then set them aside for a moment.  Next, I took a piece of Soft Suede cardstock cut at 4 1/4" by 3 1/4" and stamped the sentiment, from the Enjoy Life stamp set, in the top right corner with Blackberry Bliss ink.  I then stamped the little pattern/background stamp from the Healing Hugs stamp set in Soft Suede ink along the bottom left hand side of the Soft Suede cardstock just to add some texture under where I'm going to be placing the flower.  I layered the Soft Suede panel onto a piece of Blackberry Bliss cardstock that measures 4 1/2" by 3 1/2".  Next, I cut a piece of Gold Glimmer paper to 5 1/4" by 2" and adhered it along the bottom of a piece of Soft Suede cardstock that measures 5 1/4" by 4".  I then layered a piece of Blackberry Bliss Baker's twine from the Nature's Twine pack right along the top of the Gold Glimmer piece and wrapped it around to the back of the cardstock.  I then
layered the Soft Suede panel onto a standard A2 sized card base (8 1/2" by 5 1/2", scored at 4 1/4") made out of Blackberry bliss cardstock.  I then layered the smaller Soft Suede and Blackberry Bliss panel onto the card base using dimensionals.  I then put some dimensionals on the back of my flower and leaves and stuck some Gold Metallic thread along the back, then adhered the flower down to the bottom left corner.  For a finishing touch, I added some metallic gold pearls.  What do you think?

Well, that's it from me today.  Thank you so much as always for stopping by.  I'll have a link below to all the products used to create today's card.  Hugs!
Hugs, Christine

Tuesday, July 17, 2018

Stampin' Up! Love you to Pieces Online Card Class


To view on YouTube, click HERE.


Hi everyone! I'm so excited to introduce my next online class to you. The way my online classes will work is that if you decide you want to join the class, you will email me at christinemriley@gmail.com to sign up for the class. You will send payment via PayPal for the supplies (only the catalog items, in this case, the Love you to Pieces Bundle and the Mint Macaron, Petal Pink, and Blackberry Bliss ink pads. You will then receive from me for free with your order all of the supplies needed to create 6 cards, two each of three designs. You can see the free supplies you will be getting in the video above. I need you to please email me by noon EST on Monday, July 23, 2018 if you want to take the class. That way, I can place the order with Stampin Up, and then create your class packets and get everything shipped to you. I will ship the class items to you on Monday, July 30, 2018. The total cost of this class is $68.95 for the bundle and ink pads (this is the exact cost from the catalog) plus $8 shipping for me to ship the products and class materials to you for a total of $76.95. Along with the products and class materials, you will also get access to an exclusive class video wherein I will teach you step by step how to create the six cards. I will also provide you with a PDF document which will show step by step how to create the six cards. **If you would like to substitute any of the ink pads (say for example you already have the Mint Macaron ink pad and wish to get something else, just include that in your email. You can also add to your order if you like, just email me what you'd like to add and I'll place the order for you once you PayPal me the cost of the order. 
**If you are already a demonstrator or have another demonstrator that you would like to purchase from but you are interested in the videos for this class, for $10, you will get access to the class materials and an email copy of the PDF file. Just send me an email at christinemriley@gmail.com if you would like to utilize this option. Thanks so much, I think you will really love this class!!! :)  Hugs!
Hugs, Christine

Creating a Fun, Sweet Card with Stampin' Up's Love you to Pieces Bundle


To view on YouTube, click here HERE.

Hi everyone!  For today's card, I just had to play with the new Love You to Pieces Bundle from Stampin' Up!  This set is so versatile and I have a ton of ideas going through my head.  I'll be doing my next online card class using this bundle so stay tuned for a new blog post and video explaining all about that next class later today.  Here are some pictures of today's card:


To create today's card, I first stamped my sentiment on a piece of Whisper White cardstock and then used the heart puzzle die cut from the Puzzle Pieces Thinlits dies to cut it out.  I set that aside for a moment and then took a piece of Crumb Cake cardstock and embossed the large puzzle image from the die set.  You can cut these puzzle pieces out like normal, or you can emboss the image into your cardstock using the new Big Shot Embossing Mats from Stampin' Up.  These mats have a very low price point and give us so many more options now for using our dies.  I embossed the large puzzle onto my Crumb Cake, then cut it out like normal from some Flirty Flamingo cardstock and put some puzzle pieces aside.  Next, I adhered my Crumb Cake embossed puzzle panel to a piece of Whisper White cardstock cut at 3 3/4" by 3 3/4".  I adhered my heart puzzle pieces with the sentiment to the top of my embossed panel with dimensionals and mini dimensionals, then popped up three Flirty Flamingo puzzle pieces with dimensionals.  I then cut a piece of Flirty Flamingo cardstock to 5 1/4" by 4" and then cut a piece of designer paper in Crumb Cake from the Neutrals 6x6 designer series paper pad to 5 1/4" by 2".  I adhered that to the Flirty Flamingo and then wove some White Baker's twine along the side.  Next, I adhered the panel to my Crumb Cake card base (which measures 8 1/2 by 5 1/2, scored at 4 1/4.  I then adhered my puzzle panel with dimensionals to the card base.  For a finishing touch, I added some pearls.  And that's it.  Just a super easy but super fun and sweet card :)

Thank you so much as always for stopping by.  I'll link below all the products that were used to make today's card.  Also, don't forget to stop by later today for all the info on my next online card class, which will be using this bundle.  Huge Hugs!

Hugs, Christine

Monday, July 16, 2018

Creating a Watercolor Wash Background on your Cards


To view on YouTube, click HERE.

Hi everyone!  For today's marathon video, I have a fun watercolor wash technique to share with you guys as well as some tips on heat embossing on watercolor paper and some tips on using the Stamparatus.  Here are some pictures of today's cards:


How fun are these cards?!?!  I just couldn't stop making watercolor backgrounds :)  I created the watercolor backgrounds on watercolor paper using various Stampin' Up inks and my larger aqua painter.  I then squirted some water on to create the splotchy effect.  I then let that dry and then stamped the images from Stampin' Up's Enjoy Life stamp set, first in Versamark ink, then with Memento tuxedo black ink and then sprinkled with Clear embossing powder to get that fun embossed look.  I used coordinating cardstocks and card bases for my cards and also added some rhinestones.  I'll link below all of the supplies I used to make these cards.  I know today's video was kind of long, but I really hope you enjoyed it and will give these techniques a try :)

Thanks so much for stopping by! Big Hugs!

Sunday, July 15, 2018

Creating a Fun Beachy Scene Using Stampin' Up's Waterfront Stamp Set


To view on YouTube, click HERE.

Hi everyone!  I hope you all had a wonderful weekend.  For today's card, I wanted to show that while you can create gorgeous, intricate landscape scenes with Stampin' Up's Waterfront stamp set, you can also keep it simple and still come away with a beautiful card.  Here's some pictures of today's card:


To create this card, I first cut out a stitched circle using the Stitched Shapes framelit dies.  I then stamped my sand with Crumb Cake ink.  Next, I stamped my ocean using Coastal Cabana (stamped off) and then Pacific Point (stamped off). Next, I stamped my beach hut in Coastal Cabana ink.  I then stamped the trunks of the palm trees with Soft Suede ink (first full strength, then stamped off for further away trees).  I then stamped the tops of the trees with Granny Apple Green, full strength, then stamped off, then skewed the stamp a bit and added some Garden Green, stamped off once, then twice.  Next, I stamped my sun with Mango Medley ink.  I then created masks for my sun and beach hut using post-it notes and then stamped my sky using Coastal Cabana (stamped off twice), Melon Mambo, stamped off twice, and Daffodil Delight, stamped off twice.  Finally, I stamped the dots in my ocean with Pacific Point ink.  I then adhered my stamped circle panel to a scalloped circle cut from Coastal Cabana cardstock and cut from the Layering Circles framelit dies.  I then cut a piece of Coastal Cabana cardstick to 1 3/4 by 4" and ran it through my Big Shot with my Seaside Textured Embossing Folder.  I then adhered that panel to a piece of Crumb Cake cardstock, which measures 5 1/4" by 4".  I then stamped my sentiment with Coastal Cabana ink.  Next, I wound some White Baker's Twine around the Crumb Cake panel and then adhered the entire panel to a Coastal Cabana card base, cut at 8 1/2" by 5 1/2 and scored at 4 1/4".  I adhered my layered circles with dimensionals and then added some glitter enamel dots for a finishing touch.  What do you think?

Don't forget, registration is still open for my online card class which uses this stamp set.  Click HERE for all the info on the class and make sure to email me at christinemriley@gmail.com if you'd like to join.

I'll link below all the supplies used to create today's card.  Thanks so much as always for stopping by!

Tuesday, July 10, 2018

Stampin' Up Online Card Class using Waterfront Stamp Set


To view on YouTube, click HERE.


Hi everyone! I'm so excited to introduce my next online class to you. The way my online classes will work is that if you decide you want to join the class, you will email me at christinemriley@gmail.com to sign up for the class. You will send payment via PayPal for the supplies (only the catalog items, in this case, the Waterfront stamp set and the Balmy Blue, Garden Green, and Crumb Cake ink pads. You will then receive from me for free with your order all of the supplies needed to create 6 cards, two each of three designs. You can see the free supplies you will be getting in the video above. I need you to please email me by noon EST on Monday, July 16, 2018 if you want to take the class. That way, I can place the order with Stampin Up, and then create your class packets and get everything shipped to you. I will ship the class items to you on Monday, July 23, 2018. The total cost of this class is $41.29 for the bundle and ink pads (this is the exact cost from the catalog) plus $8 shipping for me to ship the products and class materials to you for a total of $49.29. Along with the products and class materials, you will also get access to an exclusive class video wherein I will teach you step by step how to create the six cards. I will also provide you with a PDF document which will show step by step how to create the six cards. **If you would like to substitute any of the ink pads (say for example you already have the Crumb Cake ink pad and wish to get something else, just include that in your email. You can also add to your order if you like, just email me what you'd like to add and I'll place the order for you once you PayPal me the cost of the order.  Also, as I state in the video, for one of the cards in the class, we will be using aqua painters.  If you would like to add that to your order, please tell me that in the email as well.
**If you are already a demonstrator or have another demonstrator that you would like to purchase from but you are interested in the videos for this class, for $10, you will get access to the class materials and an email copy of the PDF file. Just send me an email at christinemriley@gmail.com if you would like to utilize this option. Thanks so much, I think you will really love this class!!! :)  Hugs!Hugs, Christine

Creating a Beautiful Landscape with Stampin' Up's Waterfront Stamp Set


To view on YouTube, click HERE.


Hi everyone!  For today's card, I just had to ink up the gorgeous Waterfront stamp set from Stampin' Up.  There are so many possibilities with this stamp set.  Here are some pictures of my card:


To create this card, I first cut a piece of Whisper White cardstock to 5" by 3 3/4".  I found a reference photo I wanted to use for my scene and I quickly sketched with light pencil where I wanted my mountains, my horizon line, and the two embankments.  Next, I stamped my mountains (furthest away are stamped off once) with Balmy Blue ink.  I then stamped my trees (just the top of the stamp got inked) with Night of Navy ink.  Next, I created the bank with the one line stamp using Old Olive ink (stamped off once).  Next, I created the river using Pool Party and Pacific Point ink.  I stamped the two embankments with Old Olive ink and then stamped the closer trees with Garden Green.  I added some dots from the splatter stamp with Pacific Point ink to the lake and then added a little color in the sky using the one line stamp and Pool Party ink.  Next I stamped my sentiment with Pacific Point ink onto Crumb Cake cardstock cut at 1 3/4" by 1 3/8".  I backed that with Pacific Point an eighth of an inch bigger, then adhered it to my stamped panel using dimensionals (I also wound some silver metallic thread behind the sentiment).  I backed the stamped panel onto a piece of Pacific Point cardstock, cut at 5 1/4" by 4" and then adhered that to a piece of Whisper White cardstock cut at 8 1/2" by 5 1/2, scored at 4 1/4".  For a finishing touch, I added a few silver metallic pearls.  What do you think?

That's it from me today.  Make sure to check back later today to check out my next online card class, which will feature this stamp set.  I'll link below all the products I used to create this card.  Hugs!
Hugs, Christine


Monday, July 9, 2018

Creating an Easy Floral Card with Stampin' Up's Varied Vases Bundle


To view on YouTube, click HERE.

Hi everyone!  For today's card, I just had to play with Stampin' Up's Varied Vases stamp set again.  I love this set!  It's so easy to use and really enables you go create some gorgeous finished projects.  Here's a couple pictures of my card:


To create today's card, I first cut a piece of Whisper White cardstock to 4 1/4" by 3 1/4 inches.  I then used my T-ruler to draw a straight line across the bottom of the panel, and then stamped the little motif with Highland Heather ink.  Next, I stamped my three vases onto some scratch Whisper White cardstock and punched them out with the coordinating Vases Builder punch (they were stamped with Gorgeous Grape ink).  Next, I stamped my stems and my flowers (stems were stamped in Pear Pizzazz, Flowers were stamped in Highland Heather, and then added the vases with dimensioanls.  The purple flowers on the right side were stamped with Highland Heather and Gorgeous Grape and the sentiment was stamped with Gorgeous Grape.  I then adhered the Whisper White panel to a piece of Crumb Cake cardstock cut at 4 1/2" by 3 1/2".  I wound some Gorgeous Grape Mini Striped Ribbon along the bottom of the panel and the added a knot.  Next, I took a piece of Gorgeous Grape cardstock cut at 5 1/4" by 4" and ran it through my Big Shot with my Ruffled Textured Dynamics Embossing Folder.  I then adhered that to a Crumb Cake card base, cut at 8 1/2" by 5 1/2 and scored at 4 1/4".  I then adhered the stamped panel to the card base with dimensionals.  For a finishing touch, I added some rhinestones.  Super easy and fun! :)

Well, that's it from me today.  I'll link below all the products I used to make this card.  Thanks so much as always for stopping by.  Hugs!
Hugs,
Christine

Sunday, July 8, 2018

Huge Stampin' Up! Promotions for the Month of July!!!!!


To view on YouTube, click HERE.


Hi everyone!  I wanted to do a quick video to explain some amazing promotions Stampin' Up is having this month as well as my own personal promotion.  First up, we are having a Buy Three, Get One Free sale on select designer series paper.  I list for you in the video which papers are included in the sale and you can also see a list of designer series papers included in the flier above.
Our second promotion is absolutely amazing!!!!  If you join my team during the month of July, not only do you get your normal starter kit (which is $125 worth of product for $99, including shipping) but you also get in addition to that, 10 free ink pads from a color family of your choice!!!  Remember, Stampin' Up  just did a color revamp so this is an amazing time to join SU!  As I say in the video, I'm happy to welcome any type of new demonstrator to my team. If you would like to join just for the discount as a hobby demonstrator, I'm delighted to have you and there will be absolutely no pressure from me whatsoever to sell product or run this as a business.  However, if you want to join and run this as a business, which is what I'm doing, I'm here for you in that capacity as well, as is my upline, who is very successful with SU and is absolutely amazing.  I'll have a link below to join my team, I'd love to have you!!!!! Finally, my personal promotion this month, if you spend $50 with me this month, I will send you as a thank you gift, a spool of Silver and Pool Party Bakers Twine, which is super gorgeous.

Okay, that's it guys, thanks so much for watching this quick informational video.  All links you may need are below:

Shop Stampin Up any time Join My Team

Saturday, July 7, 2018

How to make a cute note card set using the Sheltering Tree stamp set from Stampin' Up!


To view on YouTube, click HERE.

Hi stampers! For today's card and video, I decided to create a fun note card set using the Sheltering Tree stamp set from Stampin' Up (an oldie, but goodie stamp set).  Whenever I do in person Stampin' Up events, I always bring Sheltering Tree with me.  It's a fantastic stamp set for any level of stamper and I have found that people who have never stamped before in their life come away really proud to have created a beautiful card.  This stamp set makes stamping super easy.  The video is a bit long, but it's not because it's complicated to make these cards.  I just wanted to show you two different ways to get the different colors in the leaves of the tree. Hope you enjoy the video :)  Here are some pictures of the note cards:


To create these cards, I first cut pieces of Whisper White cardstock to 3 3/4" by 5".  I then stamped all my images.  The tree trunk was stamped in Early Espresso.  The leaves were stamped in either Pear Pizzazz or Garden Green and then layered (either with stamp pad or marker, as shown in the video) with Melon Mambo, Flirty Flamingo, or Gorgeous grape inks.  I then cut a piece of colored cardstock (either Gorgeous Grape, Flirty Flamingo, or Melon Mambo) to 4" by 5 1/4" and layered the white piece on top.  I then wound some linen thread around the card panels, and then adhered to A2 sized Crumb Cake card bases.  Finally, I added some rhinestones for a finishing touch.  What do you think?

Well, that's it from me today.  Thanks so much as always for stopping by.  I'll link below all of the products I used to create these cards.  Hugs!

Hugs, Christine


Tuesday, July 3, 2018

Stampin' Up Varied Vases Online Card Class


To view on YouTube, click HERE.


Hi everyone! I'm so excited to introduce my next online class to you. The way my online classes will work is that if you decide you want to join the class, you will email me at christinemriley@gmail.com to sign up for the class. You will send payment via PayPal for the supplies (only the catalog items, in this case, the Varied Vases bundle (which includes the Varied Vases stamp set and the coordinating Vases Builder Punch, Flirty Flamingo ink pad, and Mint Macaron ink pad). You will then receive from me for free with your order all of the supplies needed to create 6 cards, two each of three designs. You can see the free supplies you will be getting in the video above. I need you to please email me by noon EST on Monday, July 9, 2018 if you want to take the class. That way, I can place the order with Stampin Up, and then create your class packets and get everything shipped to you. I will ship the class items to you on Monday, July 16, 2018. The total cost of this class is $61.50 for the bundle and ink pads (this is the exact cost from the catalog) plus $8 shipping for me to ship the products and class materials to you for a total of $69.50. Along with the products and class materials, you will also get access to an exclusive class video wherein I will teach you step by step how to create the six cards. I will also provide you with a PDF document which will show step by step how to create the six cards. **If you would like to substitute any of the ink pads (say for example you already have the Flirty Flamingo ink pad and wish to get something else, just include that in your email. You can also add to your order if you like, just email me what you'd like to add and I'll place the order for you once you PayPal me the cost of the order.


**If you are already a demonstrator or have another demonstrator that you would like to purchase from but you are interested in the videos for this class, for $10, you will get access to the class materials and an email copy of the PDF file. Just send me an email at christinemriley@gmail.com if you would like to utilize this option. Thanks so much, I think you will really love this class!!! :)  Hugs!
Hugs, Christine


Creating a Simple Card using Stampn' Up's Varied Vases Bundle


To view on YouTube, click HERE.


Hi everyone!  Today, I have a simple but sweet card I put together using the Varied Vases stamp set and the Vases Builder punch from Stampin' Up (these come together as a bundle if you wish to buy them together and save 10%).  To create today's card, I first cut a piece of Whisper White cardstock with my Stitched Shapes framelit dies using the largest square available in the set.  I then stamped my vases with Coastal Cabana ink onto Coastal Cabana cardstock and then punched the vases out with the Vases Builder punch.  Next, I temporarily placed the punched vases on the square Whisper White panel to get placement right, then I stamped my flower and stem using Coastal Cabana ink.  Next, I stamped the inside of the flower using Melon Mambo ink.  Next, I punched a leaf and a tulip top from the punch from Coastal Cabana and Melon Mambo cardstock, respectively.  I then adhered the square panel to a scalloped square I cut from the Layering Squares framelit dies and then adhered the vases to the panel and the tulip using dimensionals and mini dimensionals respectively.  The sentiment was stamped using Melon Mambo ink.

Next, I created my card base out of Thick Whisper White carestock (it measures 8 1/2" by 5 1/2" and is scored at 4 1/4").  I then cut a piece of Coastal Cabana cardstock and 4" by 5 1/4".  I then cut a piece of designer series paper from the Brights DSP pack (this is Melon Mambo) at 2" by 5 1/4".  I then wound some Polka Dot Tulle Ribbon behind the Coastal Cabana cardstock and then adhered that piece to the card base.  I  added a bow to the ribbon, then added my square panel to the card base using dimensionals.  Just a sweet but simple card that took very little time to put together.

I hope you enjoyed today's card and video tutorial.  My next online class will be using this Varied Vases bundle and I will be posting the video and blog post for that class later today so make sure to check back for that.  I will link below all of the products I used to make today's card.  Thanks so much as always for stopping by.
Hugs, Christine

Sunday, July 1, 2018

Creating Layered Scene with Stampin Up's High Tide stamp set


To view on YouTube, click HERE.

Hi everyone!  For today's card, I wanted to create a fun, layered scene using Stampin' Up!'s High Tide stamp set.  This is a card that looks super complicated to make, but once you see it done step by step, it's super easy to do.  Here are some pictures:


To create this card, I started off with a piece of Whisper White cardstock cut to 3 3/4" by 5".  I next cut out an oval (the largest oval) from the Stitched Shapes die set out of Whisper White cardstock.  I added a tiny amount of snail adhesive to the back of the oval, then ran my finger over it to get the sticky off.  Then, I stuck the white oval down on top of the white rectangular piece of Whisper White cardstock (I off centered it to the left).  Next, I stamped my lighthouse onto the oval piece.  I stamped the more detailed image (the first step of the stamp) with Night of Navy ink.  I then stamped the second step (the less detailed image of the lighthouse) with Sahara Sand ink.  Next, I stamped the sand using Crumb Cake ink.  I then turned the stamp around and kept stamping until the entire bottom of the panel was stamped with sand.  Next, I stamped the lighthouse and the sand onto some post it notes and cut them out for masks.  I layered the masks over the sand and lighthouse.  I then took a large post it note and covered up the sky (which created my horizon line).  I then stamped the ocean, first with Pool Party ink and then with Pacific Point.  Then, I lightly sponged Pool Party ink using a Stampin' Sponge onto the top portion of the cardstock panel (the "sky").  Next, I stamped the birds with Early Espresso ink.  I stamped the light coming from the lighthouse with So Saffron ink (I stamped off once, then stamped it onto the cardstock).  I also stamped the sentiment with Night of Navy ink.  After that, we were done with the stamping.

Next, I layered an oval (cut from the Layering Ovals die set) out of Night of Navy cardstock behind the white oval panel, then set that aside for a moment.  I created a card base out of Crumb Cake cardstock which is a top folding card base, measuring 4 1/4" by 5 1/2" when folded.  I then layered the rectangular piece of Whisper White cardstock on top of a piece of Night of Navy cardstock, which was cut at 4" by 5 1/4".  I then layered that panel on to the card base.  Next, I brought my oval panel back over and stuck some dimensionals on the back.  I wound some silver metallic string along the back, and then stuck the panel down onto the card.  What do you think?

Well, that's it from me today.  Don't forget I am offering an online card class using this stamp set.  To see all the details on that class, please click HERE.  The deadline for registering for this class is tomorrow, Monday, July 2 at noon EST (email me at christinemriley@gmail.com if you wish to enroll in the class).  Thanks so much as always for stopping by.  I'll link below to every item I used to create today's card.  Thanks so much!  Big Hugs!

Hugs, Christine