

To view on YouTube, click HERE.
Hi everyone! For today's card, I just had to ink up the adorable Treehouse Adventure stamp set from Stampin' Up. This is a brand new stamp set which just came out with the release of the new Annual Catalog in June. I'm in love with this stamp set! I think it may be overwhelming, especially for a new stamper, to look at a set like this in the catalog and see it has so many parts. I'm hoping that once you see the card come together in today's video, you'll see it's super easy to use this set and I promise, anyone can do this!!! Here are some pictures of my card:

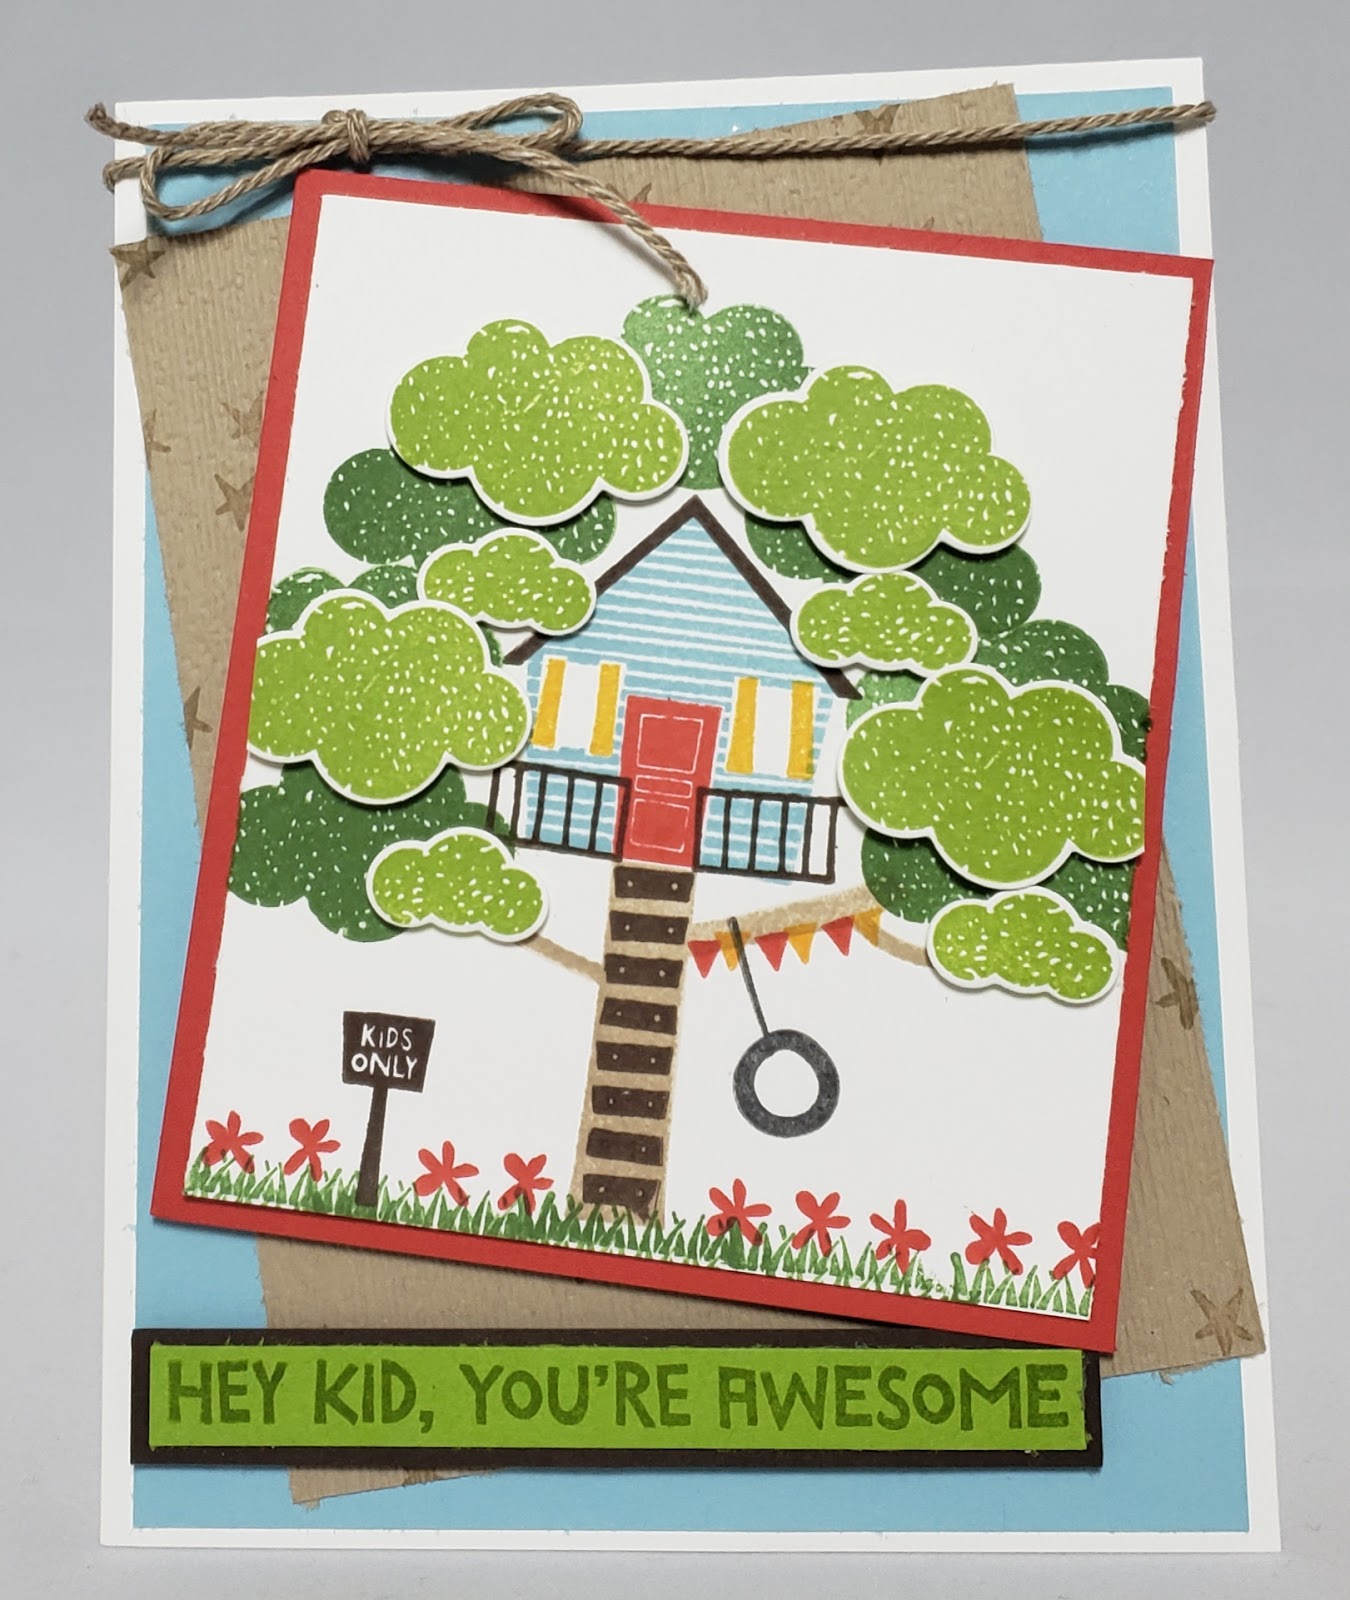
To create this card, I started with a piece of Whisper White cardstock cut at 3 1/4" by 3 3/4". This is the panel I did all of my stamping (except for the sentiment). I first stamped the tree trunk in Crumb Cake ink. Next, I stamped my house level with the top of the thick tree trunk in Balmy Blue ink. I next stamped the roof in Early Espresso. Next, I stamped the wood plank stairs leading up to the treehouse (so cute!) in Early Espresso ink. I next stamped my door in Poppy Parade ink and then stamped the shutters in Mango Melody. I stamped the porch in Early Espresso. I then created some grass along the bottom using Garden Green ink. I also used Garden Green ink to create the first, non-popped layer of green leafy tree around the tree and treehouse. I stamped the sign in Early Espresso, the tire swing in Tuxedo Black Memento Ink, and the flowers in Poppy Parade. I also stamped the little flag banner in Mango Melody and Poppy Parade. I then stamped the medium and small leafy tree parts (4 of each size) in Granny Apple Green ink onto a scrap piece of Whisper White cardstock and then cut them out with the coordinating dies in the Up & Away Thinlit Die set. I then popped them around my tree with dimensionals. I then adhered my Whisper White panel to a piece of Poppy Parade cardstock which measures 3 1//2" by 4". I then took a piece of Crumb Cake cardstock, cut at 3 1/2" by 4 3/4" and stamped the little star image from the set in Crumb Cake ink randomly over the cardstock panel. I then ran this through my Big Shot using the Subtle Textured Impressions Embossing Folder. I then cut a piece of Balmy Blue cardstock to 4" by 5 1/4" and adhered it to the front of an A2 sized notecard made from Thick Whisper White cardstock (measuring 4 1/4" by 11", scored at 5 1/2"). I adhered the Crumb Cake panel to the Balmy Blue at an angle and then adhered my treehouse panel with dimensionals at an opposite angle. I then grabbed a piece of Granny Apple Green cardstock (which measures 3 3/8" by 3/8") and stamped my sentiment in Granny Apple Green ink. I then layered a piece of Early Espresso cardstock behind it (which measures 3 5/8" by 5/8"). For a finishing touch, I added a bow to the top of the card using Crumb Cake Baker's Twine (which comes from the Nature's Twine pack. What do you think?

I just absolutely love this card and I hope you do too. Remember, Bonus Days are back!!! For the entire month of August, for every $50 you spend, you get $5 in Bonus Bucks, which you can redeem in the month of September (when the Holiday catalog is live!!!!) There is no limit to the amount of Bonus Bucks you can receive, so get shopping :) I'll link below all of the products used to create today's card. Thanks so much as always for stopping by! Huge Hugs!!!
Hugs,
Christine
This is super cute! Thanks for making the video, you made it look so easy. I haven't seen many cards made with it, but I think yours is adorable!
ReplyDeleteThat's so sweet, thank you so much!!!
Delete